
Drafting Choice Pattern Variations

Are you ready to dive into designing with the Choice Pattern? The video and written instructions will prompt you when, where, and how to make pattern manipulations to the original base pattern. You’ll find some design inspiration—with descriptions—within our instructions. Today, we’re breaking down another of the design variations to demonstrate how the original pattern pieces transform into new looks.
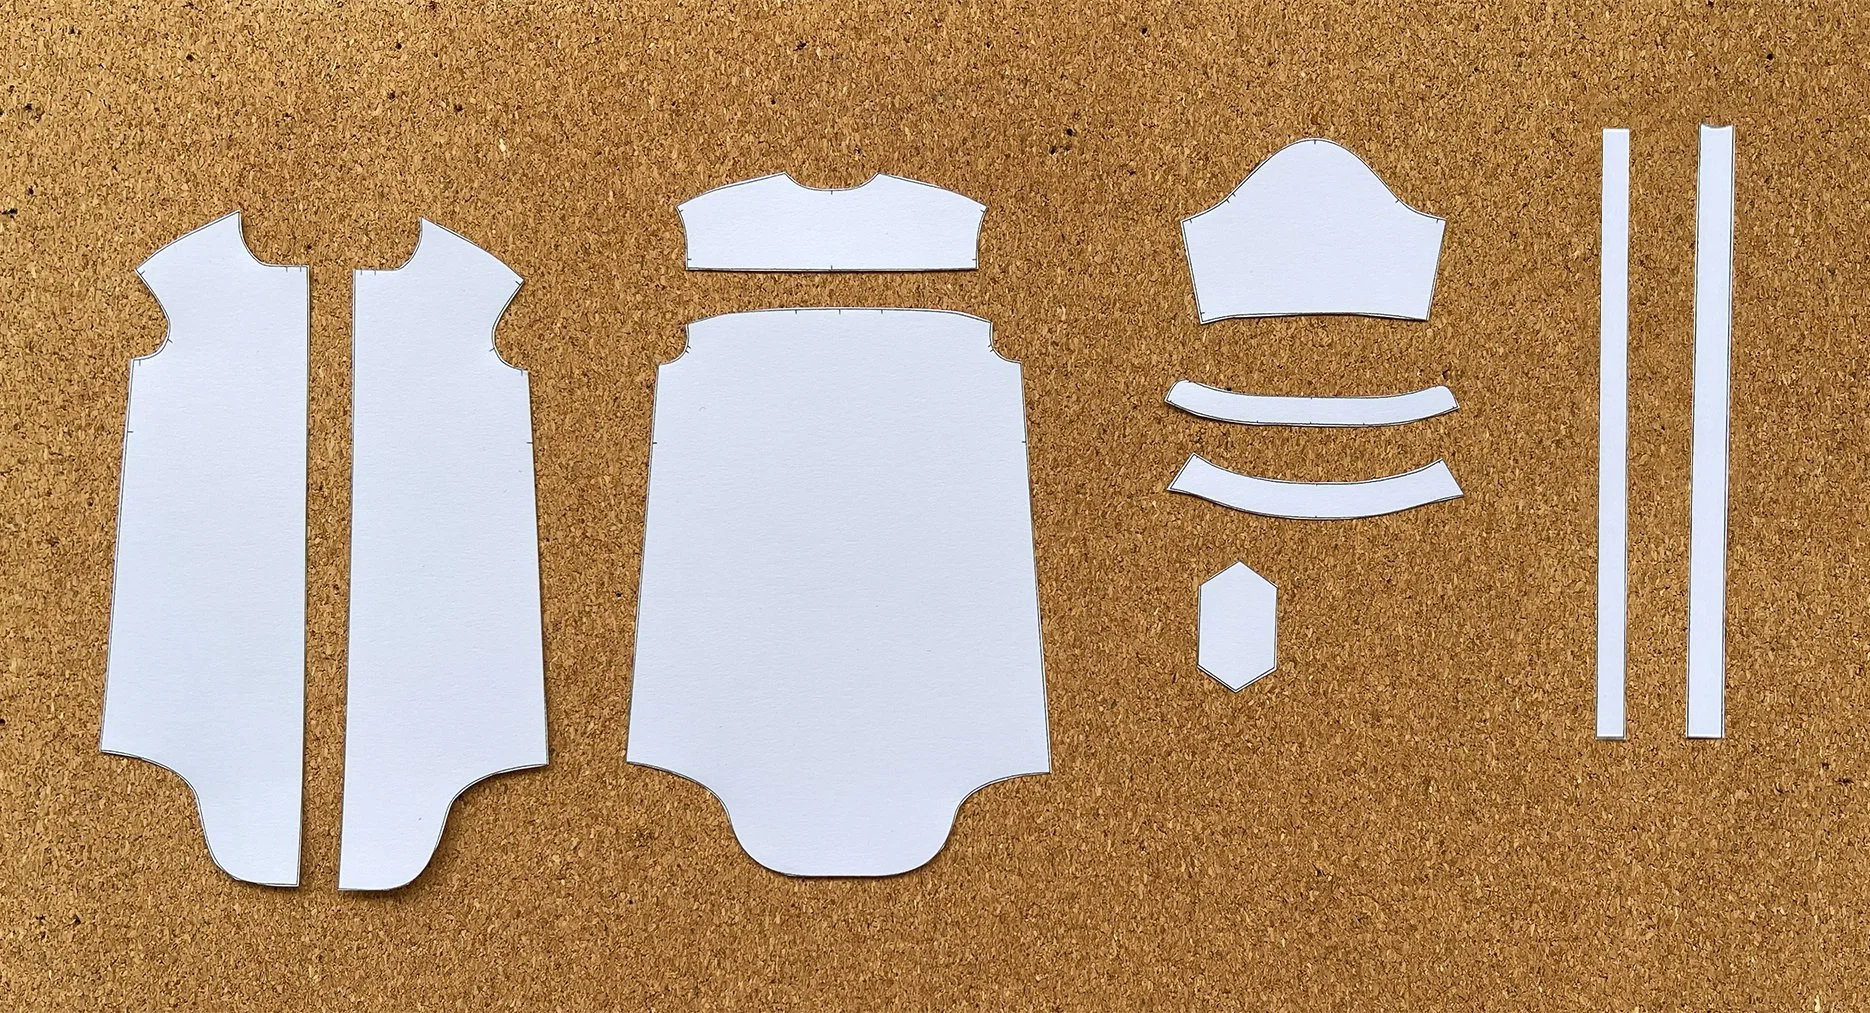
Collared shirt with added fullness and front ties

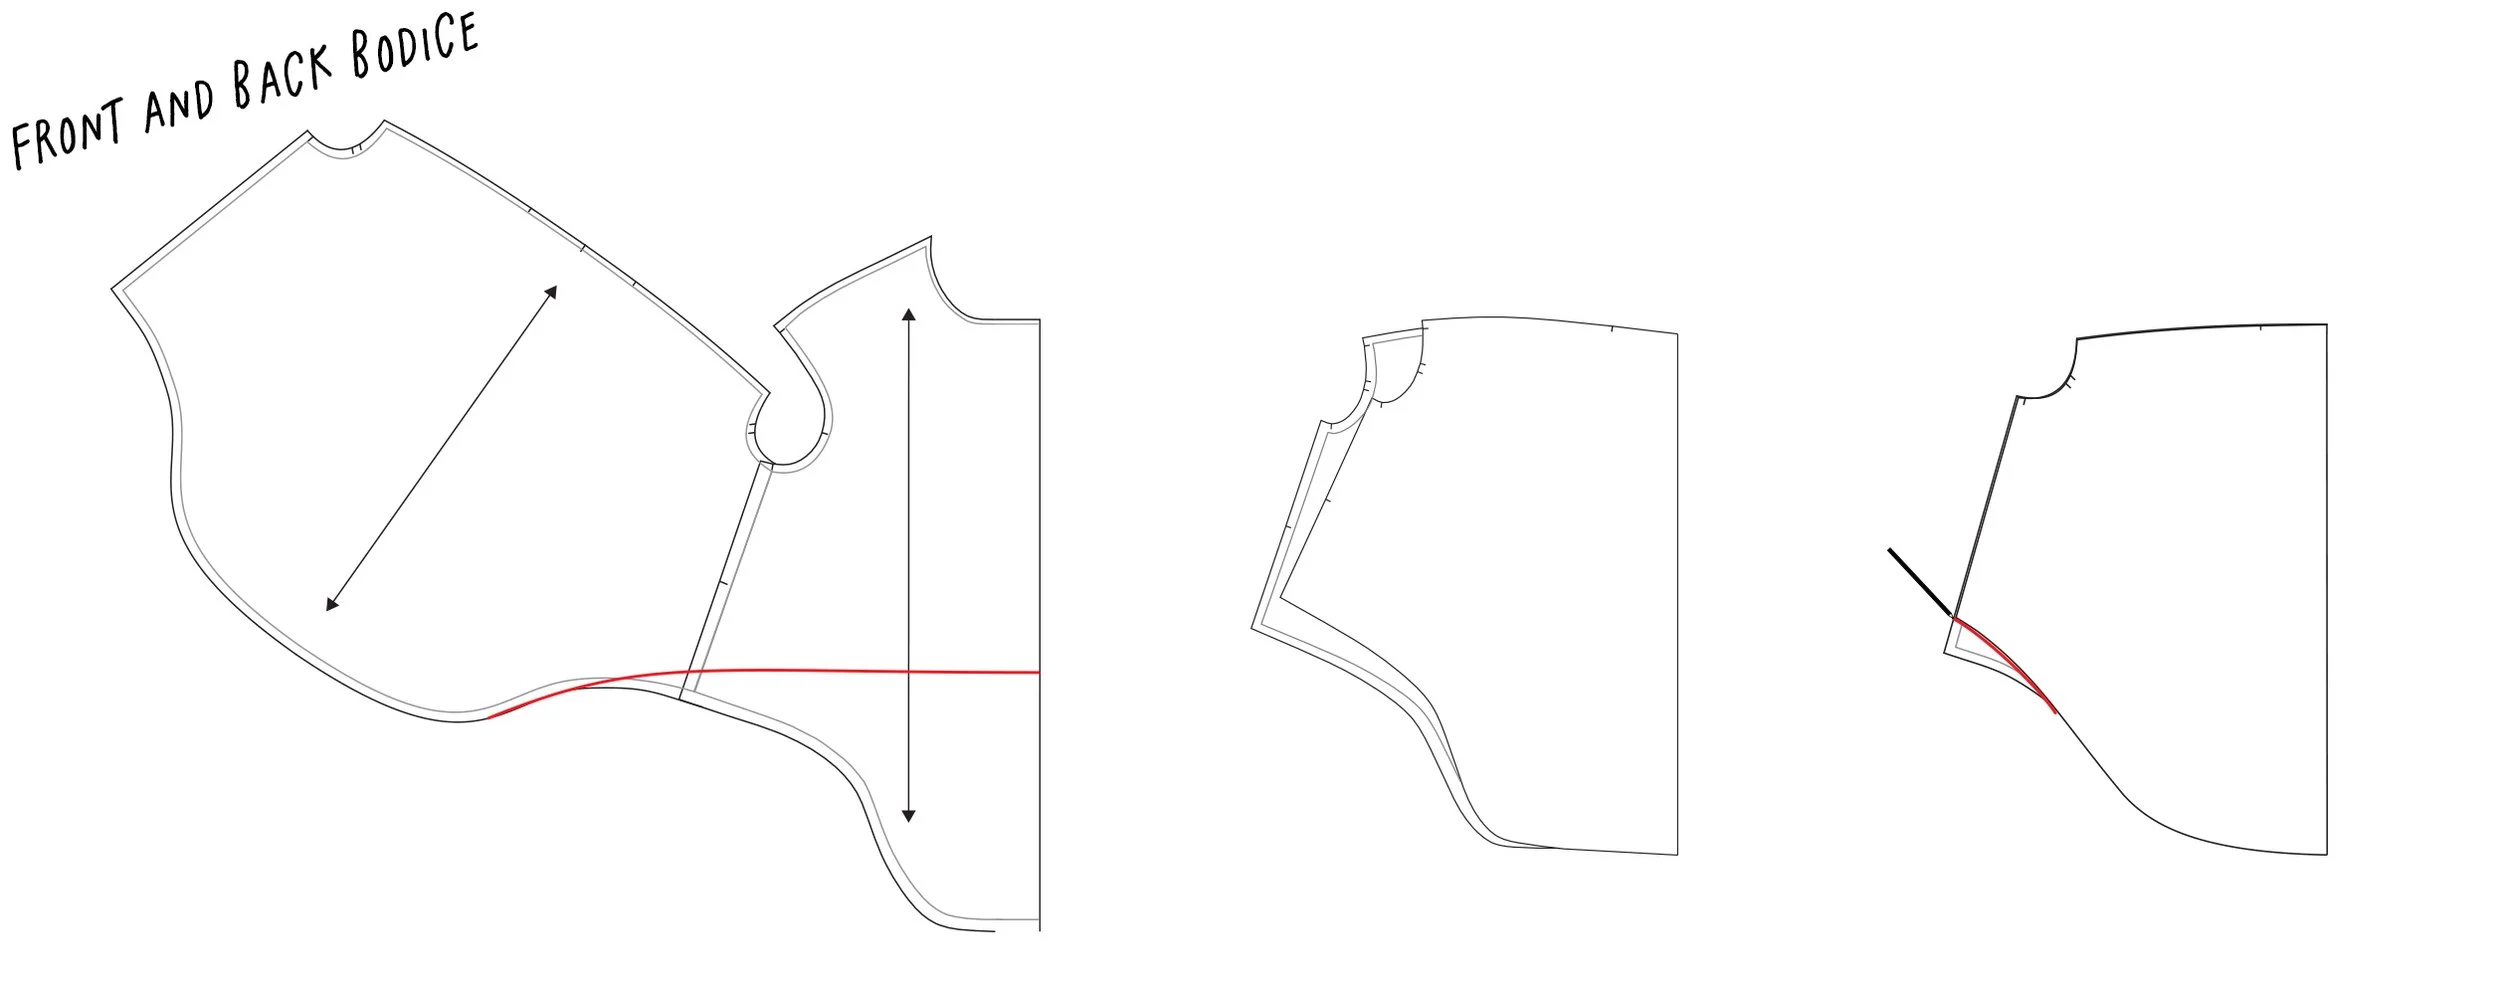
In the Choice Pattern instructions, you will learn a method called “slash and spread” to add fullness to pattern pieces. This step can be done either before or after making changes to the length; however, our instructions guide you to make this adjustment first. Begin by deciding how much fullness you’d like to add to the sweep of the hem, and incorporate that into the front and back bodice pieces. This method can also be used on sleeves. The look above includes a collar, short sleeves, and a front tie design detail.

Adding fullness is the only pattern manipulation necessary for this look, assuming the length remains unchanged. Changing the length would require an adjustment to the interfacing pieces, which is a quick fix. The images below feature each piece needed to assemble this look.

Pattern pieces from left to right: Front Right Bodice, Front Left Bodice, Yoke, Back Bodice, Short Sleeve, Collar Stand, Collar, Left Interfacing, Right Interfacing, Front Tie Channel and Front Ties.

Collarless dress with added fullness, lantern sleeves and front ties

In this variation, you will use the slash and spread method to add fullness as well as add length. Start with adding the desired fullness. Then, take those new pieces and add length for a dress. The front ties in this image are assembled the same way as the shirt version. However, the ties are fed into the channels in the opposite direction - a decision that can be decided at the end. Long ties that exit out of the side, rather than the center, can either hang down the length of the dress or be used as a waist tie. Use any sleeve variation, like the lantern sleeve pictured here which is included in the file package.

The front placket interfacing pieces will need adjustment anytime the length is altered. A front facing piece is also included in the file package, but may need to be drafted to match your new neckline if enough volume was added to change the shape of the neckline. Don’t worry, we show you how to do that in the instructions too.

Pattern pieces from left to right: Front Right Dress, Front Left Dress, Yoke, Back Dress, Upper Lantern Sleeve, Lower Lantern Sleeve, Front Facing, Front Tie Channels, Front Ties, Left Interfacing and Right Interfacing


Collared dress with decreased fullness, short sleeves and side seam pockets

The base pattern comes with a decent amount of fullness in the bodice, but you may want to reduce it to a more slimmer silhouette. Our instructions show you how to slash the bodice and and remove fullness, while preserving the measurements along the neckline and armholes.

Be sure to only decrease the fullness enough to accommodate the widest part of the body, especially when making it a dress. The blue dress in the image above has side seam pockets, which is easily done by adding the pocket extensions as mentioned in the written instructions. Those, of course, are always optional.
Pattern pieces from left to right: Front Right Dress, Front Left Dress, Yoke, Back Dress, Short Sleeve, Collar Stand, Collar, Patch Pocket, Left Interfacing and Right Interfacing

Collared crop top with decreased fullness, no sleeves and patch pockets

Here’s another look with fullness taken out of the bodice pieces, but the length has been shortened this time. There’s no worry about how it will fit around the hip area because the hem falls above the natural waist. The hem is a straight line along front and back, so all we did was determine where we wanted it to fall and cut it off. The base pattern is already drafted with the armhole seam dropping slightly down the bicep, which is beautifully demonstrated in the image above.

The raw edge of the armhole will be finished with binding around the opening. Watch our instructional video on binding necklines for a detailed demonstration of this technique. The method shown there applies perfectly to this application as well.

Pattern pieces from left to right: Front Right Bodice, Front Left Bodice, Yoke, Back Bodice, Patch Pocket, Short Sleeve, Collar Stand, Collar, Armhole Binding, Left Interfacing and Right Interfacing

Collared dress with long sleeves and side seam pockets

Adding length to pattern pieces is represented in this look. Use the “shorten and lengthen” lines printed on the base pattern to know where to separate each piece. It’s not out of the question to add more than one shorten and lengthen line to add length in a couple places. Add the extensions along the side seams for pockets after you have added length. Use the same method for adding length to the sleeve to make it a long sleeve. Or go sleeveless to make it a cool vest layering piece.

This version has just a couple of easy adjustments and will make a final garment which is great as a dress or layering piece.

Pattern pieces from left to right: Front Right Dress, Front Left Dress, Yoke, Back Dress, Long Sleeve, Collar, Collar Stand, Patch Pocket, Side Seam Pocket, Left Interfacing and Right Interfacing

Collared shirt with short sleeves and a high-low hem

The only adjustment made to this look was the high-low hem. The base pattern comes with some fun shirt tails, but you can make any hem you like. We show you how to raise the hem at the center front and blend it into the back. No matter how much you alter the hem lines, the pieces need to match each other along the side seam. In this look Abigail added a pop of color along the hem with a bright orange fabric cut on the bias.
Use this techniques whenever you are changing any hemlines on a sewing pattern. Verifying the side seams match in length and the hemlines are trued seamlessly is crucial to having a successful sewing process.

Pattern pieces from left to right: Front Right Bodice, Front Left Bodice, Yoke, Back Bodice, Short Sleeve, Collar, Collar Stand, Patch Pocket, Left Interfacing and Right Interfacing

This is the sixth variation highlight for the Choice Pattern, and there will be many more coming to this same page. We designed this pattern to help build your confidence in making adjustments and pattern hacks. While it’s not intended to turn you into an expert patternmaker overnight, it will help you develop valuable skills for customizing all the patterns in your collection. Read more about the Choice Pattern here! As you become more comfortable with these modifications, you’ll discover new ways to create unique, personalized garments that perfectly express your style and vision. Show us your work on social media with #ChoicePattern.